The Moto E3 Power might not pack in as powerful specs as the Redmi 3S, but it is still a formidable handset for its price. The 3500mAh removable battery of the handset ensures that it can last for at least a couple of days easily on a single charge. And unlike the Redmi 3S, you can actually buy the Moto E3 Power right away.
So, if you recently purchased a Moto E3 Power, congratulations! Now, check out some of the tips and tricks we have compiled for the handset below that will help you in getting the most out of the phone.
Use the Stock Charger
The Moto E3 Power is among the very few budget devices in the market with rapid/fast charging support. When charged with its bundled 10W rapid charger, the gigantic 3500mAh battery of the Moto E3 Power takes substantially less time to charge when compared to charging with a regular charger.
Quickly launch the Camera app
The Moto E3 Power misses out on the excellent double-twist gesture found on other Moto phones to quickly launch the camera app. However, since the phone runs a near stock build of Marshmallow, the option of launching the camera app by quickly double pressing the power button akin to Nexus devices is found on the device. The 8MP shooter of the Moto E3 Power might not be a terrific snapper, but thanks to this shortcut, be rest assured that the camera app will be ready to capture moments that count.

Do Not Disturb
Google had first introduced the concept of Priority notifications/Do not Disturb with Lollipop, but its implementation was a mess. With Marshmallow, Google fixed all the issues with Do not Disturb and has enhanced it further by adding some relevant options.
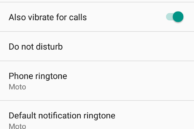
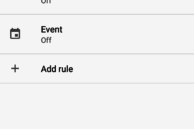
With Do not Disturb set up, you can set your phone to not notify you of any incoming notifications during certain hours of the day. You can also set Do not Disturb to notify you of only ‘priority’ notifications from your selected contacts and apps. Do not Disturb can also be set to automatically trigger itself on/off on certain days and during certain hours of the day. You can find all options related to Do not Disturb under Settings -> Sound & notification -> Do not Disturb.
Move Apps to SD Card
The Moto E3 Power comes with paltry 16GB of internal storage out of which one gets access to around 11.8GB of free space. This might sound sufficient in the beginning, but over time as you install more apps and the cache size of your installed apps increase, you will quickly start running out of space on the handset. Since the Moto E3 Power comes with a microSD card slot, you can always move apps to SD card to free up some space on the internal storage of the device. The process is slightly different on the Moto E3 since it comes with support for Marshmallow’s adoptable storage feature. You can find the steps to move apps to SD card on the Moto E3 Power here.

Customise Quick Settings
Since the Moto E3 Power runs on a stock build of Android, it lacks all the bells and whistles that one can find in other devices of this range. This also means that the handset lacks the basic option of customising the tiles to one’s liking in Quick Settings. Thankfully, Google has included an option to customise the Quick Settings panel in Marshmallow, though the option is hidden by default.
To enable it, expand Quick Settings and then press and hold the cog icon located at the top-right corner of the display for a few seconds. You will then automatically get a toast notification saying that the hidden SystemUI tuner menu has been enabled.
Now head over to Settings -> SystemUI tuner -> Quick Settings and rearrange the tiles according to your liking. You can also add new tiles, though the options are pretty limited.
VoLTE
The Moto E3 Power supports Reliance Jio out of the box. This includes VoLTE support which means that you can make calls directly from the phone without using the JioJoin app. If for some reason VoLTE on Reliance Jio is not working for you, make sure to restart your handset. You can confirm that VoLTE is working on your Moto E3 Power from the VoLTE symbol that pops up on the status bar. Sometimes, the VoLTE symbol can suddenly disappear from the phone. In such cases, a simple restart will be good enough to fix the problem.
Got any other handy tips to share for the Moto E3 Power? Drop a comment below and let our reads know!


