The Moto G4 and Moto G4 Plus, unveiled last week, run on a near stock build of Android, so they are not as feature loaded as other phones in the same segment. Since they also run on Marshmallow out of the box, the phones make use of the new adoptable storage feature introduced by Google with the OS.
Considering that LG and Samsung decided to skip implementing adoptable storage feature on their flagship handsets this year, it was a strange decision from Motorola and Lenovo to go with it. Last year, once the company rolled out the Marshmallow update for the Moto G2 and Moto G3, there was a dramatic increase in owners asking how to move their apps to SD card.
Adoptable storage sure is a nice feature to have because once you set it up, there is no need to manually manage your apps and their data. The OS automatically does it for you. However, it also has some downsides, including losing the ability to remove the SD card anytime from the phone and the confusing initial setup process. Worry not though, as we have you covered. Follow the steps below to know how to setup the SD card on the Moto G4 and Moto G4 Plus, so that you can easily move apps to it.
Tip: If you have not already, make sure to buy a microSD card with a Class 10 or higher rating.
Step 1: Insert a microSD into your Moto G4 or Moto G4 Plus, and then head over to Settings -> Storage & USB. You should see the card you just inserted under ‘Portable storage.’

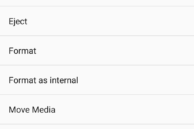
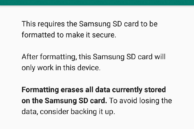
Step 2: Tap on its name to open the built-in file manager. Tap the 3-dot overflow menu button followed by Settings. From the menu that opens, select the Format as internal option followed by Erase and format.
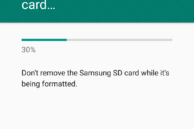
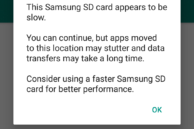
Step 3: Depending on the size of the SD card inserted, the whole process can take as much as up to 5 mins. Once done, you might get an error message that the SD card you have inserted is too slow that can lead to performance of the phone and the installed apps being affected.
Step 4: You will also get an option to migrate your existing date from the internal storage to the external storage. Doing this will move photos and videos to the SD card, and NOT app data. You still need to do it manually.
Once the process is complete, head over to Settings -> Storage & USB and you will notice that the total device storage has now increased to include the size of the SD card as well. It will be slightly lower than the total i.e. if you insert a 64GB card, it will not show up as 32+64 = 96GB, but around 90GB after taking into consideration the space that is lost to formatting and taken by the Android OS itself.
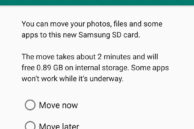
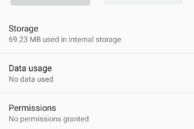
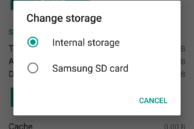
Step 5: To move apps and games to SD card, head over to Settings -> Apps. Now, select the app that you want to move to SD card. Tap on Storage and then select the Change option from under Storage used. Finally, select the SD card and confirm your selection by tapping Move. Depending on the size of the app or game and the speed of the SD card, the whole process can take a minute or two.
Remember that to use this same SD card on other devices, you will have to format it again. Also, you cannot remove the SD card from the phone while it is switched on. Doing so can lead to a loss of data and the phone overall just behaving weirdly.
Note that the above steps will also work on the Moto G3 and the Moto G3 Turbo Edition running Marshmallow.

