The Moto E4 and Moto E4 Plus were launched in India and the rest of the world by Motorola last month. Successor to the popular Moto E3 Power from last year, the handset’s are a huge improvement in almost every regard. However, since we are talking about budget oriented smartphones here, Motorola has had to cut corners in a few places. This is evident from the fact that the Moto E4 comes with 16GB of storage space, while its Plus sibling comes with 32GB of storage.
While 16/32GB of internal storage might have been sufficient a few years ago, it is clearly not enough in this day and age. Click a few photos and videos, install a few apps and games, and you are likely to run out of internal storage space on your Moto E4/Plus in no time. Owners of the smaller Moto E4 are likely going to suffer the most here since out of its 16GB internal storage, only about 11GB is available to them.
Thankfully, Moto includes a microSD card slot on the Moto E4 and E4 Plus and since the handsets are running a near-stock build of Android, they also feature Adoptable Storage. As the name suggests, Adoptable storage lets you ‘mount’ or ‘adopt’ an external storage as an internal one. The feature might be a bit complicated to use for first time smartphone users, but once you get the hang of it, it is actually pretty useful.
How to Move Apps to SD Card on Moto E4 and E4 Plus
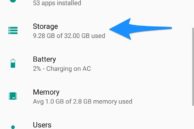
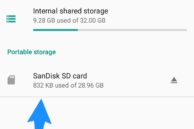
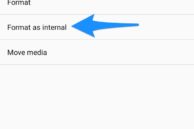
Step 1: Insert a Class 10 or higher SD card on the Moto E4/Plus. Then, head over to Settings -> Storage, tap on the SD card name. When the file manager opens up, tap the 3-dot overflow menu button located on the top-right corner and select Storage Settings. From the menu that opens up, select the Format as internal option.
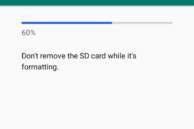
Step 2: In the setup process, select the Use as internal storage option. This will then format the SD card and ‘fuse’ it with the internal storage. Once this mode is selected, the SD card inserted in your device will not work with any other device unless it is formatted first.
Setting up the SD card as portable storage will only allow you to move photos and videos to it and you will not be able to move apps to it. However, as Portable storage, you will be able to use the SD card with other devices without having to format it first and also easily transfer files to and fro from your PC. There is no workaround to this problem and you will have to accept this trade-off if you end up mounting your external SD card as an internal one.
Step 3: The time taken by the formatting procedure will depend on the size of the SD card inserted and its speed. If you are using an SD card slower than Class 10, you will also get a prompt saying the SD card appears to be slow and can affect system performance.
Once the formatting procedure is over, you will also be prompted to move your existing apps and data to SD card. Depending on the total data size, the process can take up to 5-10 minutes.

Step 4: With the SD card formatted and set up, head over to Settings -> Storage. You will now see the total device storage has increased by the size of the SD card insert. So, if you insert a 32GB SD card, the total device storage on your Moto E4 Plus, the total device storage will now read as around 44.5GB after accounting for space lost in formatting and occupied by the system.
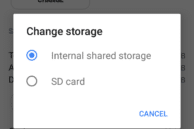
Step 5: To move apps to SD card, head back to Settings -> Apps and select an app. Tap on Storage followed by the Change button located under the ‘Storage used’ section. From the pop-up, select the name of the SD card after which you need to tap Move to start the app transfer process. Depending on the size of the app and the speed of the SD card installed, this process can take up to a minute or two.
Repeat the step mentioned above to move all other apps to SD card. Remember that some apps cannot be moved to the SD card and they will simply lack the appropriate option under their Storage used section.
If you ever want to remove the SD card from your Moto E4/Plus and use it on any other device, head over to Settings -> Storage and tap the SD card name to open the file manager. Now, tap the 3-dot overflow menu button on the top-right corner and select the Format as Portable option.
