![]()
While Google does not mention anything about an RGB notification LED on the Pixel and Pixel XL, the handsets do come with one — just like previous Nexus devices. The hidden notification LED needs to be manually enabled, and since it is located inside the earpiece grille at the top, it is not always easily visible.
Nonetheless, an RGB notification LED is a handy thing to have on a smartphone since it can let you know if you have any unread notification and its priority without having to touch the device at all. So, check out the steps below to know how you can activate the RGB notification LED on your Pixel handset.
Step 1: Head over to Settings -> Notifications. From there, tap the Settings icon located at the top-right corner of the display.
![]()
Step 2: Enable the Pulse notification LED toggle, and you’re done!
![]()
While you have now enabled the hidden RGB notification LED, it will be of very little use if you don’t customize it to your liking. Google does not offer any such feature built into Android, so you will need to use an application called Light Flow for it.
How to customize the RGB Notification LED
Step 1: Download and open Light Flow. Proceed to bring up the hamburger menu by sliding to the right. From there, select Notification settings.
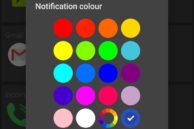
Step 2: Here you will get a list of all the apps and their notification settings, including the one for the RGB LED. By default, Light Flow automatically sets up notifications for a few system events and notifications. If you only want to customize the RGB notification LED color for any such app or system event, tap the colored icon on the respective card and select a color of your choice.
Step 3: To add an app of your choice, tap the + symbol located on the bottom-right corner. Now, you will get the option to customize the notification LED for a system event, an ongoing/persistent notification, an application, or a contact of your choice. Depending on what you want, select the appropriate option.
Step 4: For this example, I am going to customize the notification settings of the Gmail app. When you select an app, Light Flow will automatically assign its pre-defined settings to it. To customize it, tap the 3-dot overflow menu of the notification card of that app and select Settings.
Step 5: From here, you will be able to customize almost every aspect of the notification of that app. To tweak setting particularly related to the notification LED, swipe to the ‘Light’ tab. Under this tab, you will be able to change the notification LED color, its blinking speed, cycle color, and more.
Once you are done customizing the notification according to your liking, you can test it by tapping the Test button located on the top navigation bar. Proceed to press the power button to switch off the display and wait for a few seconds. The notification LED should now blink as you had set it up.
How have you customized the notification LED on your Pixel or Pixel XL? Drop a comment and share your customizations with us.


