Unlike Marshmallow, Google has introduced plenty of new features with Android 7.0 Nougat. While the key highlights of the OS have to be the redesigned notification shade, Direct Reply, and multi-window multitasking, the latest and sweetest version of Android also comes with many little useful additions and enhancements.
One such feature that Google has introduced in Nougat is the ability to change Display Density easily. While it was possible to change display density on previous versions of Android as well, it required the use of adb and on some devices, root access.
In case you are unaware of what Display Density is, it allows you to regulate the amount of information being displayed on the screen. Changing the Display Density leads to the size of actual UI elements increasing/decreasing, unlike say while changing Font size which only controls the size of the font and only some associated UI elements.
Changing the Display Density might not seem like a feature that many people think they will use, but once you start using it and find that perfect density for your device, there is no going back.
So, here’s how you can change the Display Density of your Android device running Nougat, including the Google Pixel, LG V20, LG G5, and others.
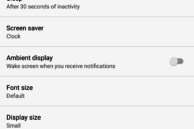
Step 1: Head over to Settings -> Display -> Display Size.
Step 2: Depending on your preference, drag the slider at the bottom to the left or right. Dragging it to the left will make everything smaller on the screen while dragging it to the right will do the opposite.
Step 3: Once you have found the perfect density for your phone’s display, simply exit the Settings menu for your changes to be saved.
Do note that changing the display density only affects apps and Android OS itself, with games remaining unaffected since they use their own scaling options.
On some Samsung devices running Nougat, the display density option will be shown as Display Scaling under Display. The feature is also available on some of Samsung’s devices running Marshmallow like the Galaxy S7 and S7 edge.


