Motorola recently launched the Moto E4 and Moto E4 Plus in India. These new budget handsets from the Lenovo-owned Moto are meant for first-time or casual smartphone users and come with beefy batteries to ensure they easily last through a day. In typical Moto style, the Moto E4 and E4 Plus run on a near-stock build of Android Nougat. However, this does not mean that they don’t come with plenty of hidden features. Plus, there are always a few tips and tricks that you can use to get the most out of these handsets.
So, if you are a new Moto E4 or Moto E4 Plus user looking for some tips and tricks for the handset to make the most out of it, check them out below. I have also highlighted some features of the handset below which might not be obvious to many.
Best Moto E4 and Moto E4 Plus Tips and Tricks
Change the Display Density
Like with any other device running Android Nougat, the Moto E4 and E4 Plus also come with the option to change the display density. Changing the display density is different from changing the font size since here the actual size of the content being displayed on the screen is adjusted rather than just their font size. A lower display density means more content is displayed on the screen and vice versa.

Changing the display density is a particularly useful thing to do especially on the Moto E4 Plus since it comes with a 5.5-inch display. This will allow you to make the most of the bigger screen by displaying more content on it.
To change the Display Density on the Moto E4 or E4 Plus, head over to Settings -> Display -> Display Size.
Jump to Relevant Menu from Quick Settings
You can access most of the commonly used system settings like Wi-Fi, Bluetooth etc. from the Quick Settings panel on the Moto E4 and E4 Plus. If you want to jump to the relevant menu of that settings, you can do so from the Quick Settings panel by simply long pressing the tile.
For example, tapping on the Wi-Fi or Bluetooth tile will expand it to show the list of Wi-Fi networks or Bluetooth devices available. However, if you long press the Wi-Fi or Bluetooth tile, you will be automatically taken to the Wi-Fi/Bluetooth settings page.
Customise Quick Settings
By default, the Quick Settings panel on the Moto E4 and E4 Plus comes with 10 tiles for the most commonly used system settings. You can, however, customise the panel to remove or rearrange tiles or even add custom tiles for specific actions.
To customise the Quick Settings panel, expand it and tap the edit button — the pencil icon being displayed on the left of the Settings button. Once you have entered the edit mode, you can rearrange tiles by dragging and dropping them anywhere you like. Similarly, you can add new tiles by dragging them from the bottom section to the top. To add custom tiles, you will have to use third-party apps from the Play Store like Quick Settings Tiles.
Quickly Launch the Camera App
Unlike the Moto G series, the Moto E4 and E4 Plus do not come with the option of quickly launching the camera app via a dedicated screwdriver-like gesture. However, Moto was still smart enough to include a shortcut for quickly opening the camera app: a double press of the power button. This shortcut is slowly becoming popular among many Android devices and was first introduced by Google with the Nexus 6P in 2015.
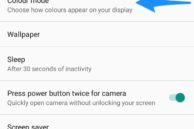
If the shortcut is not working on your Moto E4/Plus or you want to disable it for some reason, you can do so from Settings -> Display.

One-Button Nav
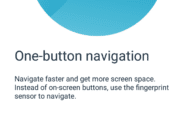
Similar to the Moto G5 and Moto G5 Plus, the Moto E4 and Moto E4 Plus also comes with the handy One button nav feature. The feature hides the navigation bar thereby expanding the effective viewing/display area. It makes use of the fingerprint scanner in the front for navigating around the UI, with a swipe to the left on the scanner acting as a back button while a right swipe will bring up the Recent apps view. Tapping on the scanner will make it act like a home button. One button nav might seem a bit unintuitive at first, but once you get used to it, there is no going back.
To enable One-button nav, open the Moto app and enable the One-button nav‘ feature from under Moto Actions.
Lock Apps Using Fingerprint Scanner
The fingerprint scanner on the front of the Moto E4 and Moto E4 Plus can be for more than just locking/unlocking the device and one-button nav. You can also use it to lock third-party apps installed on the phone. While most OEMs bake this functionality by default on their handsets, you will have to make use of a third-party app to achieve the same on the Moto E4 and Moto E4 Plus. The process is relatively simple and requires one to use one of the many apps available on the Play Store.
Read: How to lock apps using fingerprint scanner on your Android device
One-Hand Mode
The Moto E4 Plus comes with a 5.5-inch display which can make it a bit difficult to use it one-handed. To make things easier, Moto has included a ‘Swipe to shrink screen’ feature which makes the screen smaller for easier one-handed use. The display is scaled down to the left or right part of the display depending on where you swipe from.

Make sure to enable Swipe to shrink screen feature from under Moto Actions in the Moto app. Then, you can enable the feature by simply swiping down to the left or right edge from the centre of the display.
Change the Color Mode
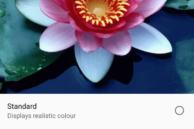
The Moto E4 and Moto E4 Plus feature an LCD display which pales in comparison to the panels used by Xiaomi on its Redmi devices. While the display on the Moto E4 and E4 Plus is not bad, they are not particularly vibrant and look a bit washed out. You can get around the washed out display to a certain extent by changing the color mode of the Moto E4/Plus to Vibrant from under Settings -> Display -> Color mode.
Move Apps to SD Card
The Moto E4 comes with 16GB storage while its Plus sibling comes with 32GB of internal storage. While this might seem sufficient at first, once you start installing all your usual apps and games, start clicking photos, you will run out of space in no time. Since the Moto E4 and E4 Plus run on a near-stock build of Android, they also come with Adoptable Storage feature which was first introduced by Google in Marshmallow.
The feature ‘adopts’ an external storage as an internal one thereby expanding the total device storage. While handy to have, Adoptable storage can be a bit challenging to set up especially for new users. Additionally, it also makes moving apps to SD card a bit more complex than it should be. If you are confused on how to move apps to SD card on the Moto E4 or E4 Plus and what the Adoptable storage feature is all about, make sure to read our guide on it.
Experience Dolby Audio
If you own a particularly nice pair of earphones, you should first set them up on your Moto E4/Plus using the bundled Dolby Atmos app for optimum sound quality. While the DAC inside the handsets is not powerful enough to drive high impedance headphones/earphones, the addition of Dolby Atmos does help in delivering excellent sound quality.
Depending on the music you listen to, you can use the Dolby Atmos app to ensure that optimum sound quality is delivered.
The above tips will help you in getting the most out of your Moto E4 or Moto E4 Plus. If you have any other tips for the handsets, do drop a comment below and share them with our readers.


