Unlike Marshmallow which was all about stability and under the hood improvements, Android is 7.0 and 7.1 Nougat come with plenty of new features and enhancements to play around with. In fact so much so, that even power Android users will not be able to list all the new features in the OS in one go.
I have already highlighted all features of Android 7.0 Nougat in this article, so in case you are still not aware of all the new features in Nougat, do make sure to read it. As for this article, I will be sharing some top tips and tricks for the latest and sweetest version of Android. These tips will help you free up more storage on your device, quickly jump to specific actions in apps, and more.
Data Saver
One of the key new features on Android Nougat is the new system-wide Data Saver mode that helps in reducing mobile data usage. The feature works by restricting apps from receiving or sending data in the background. Your frequently used apps will continue to have access to data in the background, but the frequency will be reduced to limit data usage. Another unintended positive side effect of using the Data Saver mode is that it leads to a slight improvement in battery life.
Here’s how you can enable Data Saver mode on your Android device running Nougat:
1. Head over to Settings -> Data Usage -> Data Saver.
2. Toggle the switch on the top right corner to On, and you are done.
In case you don’t want mobile data usage to be restricted for certain apps, you can always whitelist them from the Data Saver mode by using the Unrestricted data access option.

Automatically Free Up Storage space
To ensure that you don’t run out of storage space on your Android device with photos and videos that have been already backed up, Google includes a handy ‘Smart Storage’ option in Nougat. The feature ensures that when the system Storage space is running low, the OS can delete your backed up photos and videos to free up space automatically. This feature only works when you have set Google Photos to automatically back up your photos and videos — and if you are not already, you really should.
To enable Smart Storage, head over to Settings -> Storage -> Manage Storage. Make sure to enable the Smart Storage option from the menu that opens up. You can also decide whether the feature should delete photos that are 30, 60 or 90 days old from the Backed up photos & videos option.
If you want, you can also manually free up storage space by using the Free up space now option.

Display More Content On-screen
One of my favourite Android hacks pre-Nougat was the ability to change the DPI of the screen to display more content on-screen. Depending on the device, I either had to root the device to achieve this or just run some simple ADB commands. While cumbersome, it was well worth the effort. With Nougat, Google has natively added an option to change the display density.
![]()
The option is available on all Nougat running devices irrespective of their screen resolution or size. By lowering the Display size, you can display more information on the screen of your Android device, while increasing it will make all content on the screen bigger and easier to read. Changing the DPI is more than just about increasing or decreasing the font size.
To change the display density on your Android device running Nougat, head over to Settings -> Display size and depending on your preference, change it to ‘Small’ or ‘Larger.’
Switch between Apps Like a Pro
Google has introduced a number of features in Android Nougat that make multitasking easier by introducing features like split-screen multitasking. Now, you won’t always be using split-screen multitasking on your device. In many scenarios, you will just end up switching between two apps to copy or reference content from them. To make this process easier, Google is making it easier to switch between two apps. A simple double tap on the Recent Apps button will be enough to make you jump to the last app you used from the existing app.
So, for example, if you have Twitter and Chrome opened, you can quickly switch back to Twitter from Chrome by double pressing the Recent Apps button and vice versa.
Multitask with Two Chrome Windows
Google introduced multi-window multitasking with Nougat that allows one to run two apps side-by-side. But did you know that you can even run two Chrome windows side-by-side? With Chrome open, long press the Recent Apps button to bring the multi-window UI. Now, tap the three-dot overflow menu button located on the top-right corner in Chrome and select ‘Move to other window.’ This will open two windows in multi-window mode thereby allowing you to compare or browse stuff simultaneously.

Custom Quick Tiles
Google has introduced a new custom Quick Settings API that lets third-party apps add their own custom tiles in the Quick Settings panel. The API might not seem like a big deal at first but using apps like QuickTile Quick Settings, users can add toggles or quick shortcuts to any app or setting they want. For example, using the Caffeinate app, users can add a tile to increase the screen out time. Similarly, using QuickTile Quick Settings, you can add custom apps or activity shortcuts.
Pin Apps in Share Menu
The ‘Share’ menu in Android remains one of the best features of Android and Google has consistently improved it with every new iteration of the OS. Now, since every app has access to the Share menu in Android, the menu can get populated pretty quickly. Worse, the menu does not follow any particular order and will vary depending on the type of media and app you invoke it from.
So, if you frequently share content to one particular app, it can get pretty frustrating to having to find that app in the reshuffled list every single time. In Nougat, Google has introduced the ability to pin apps to the top in the share menu thereby making it easier and quicker to share content easily.
To pin an app to the top in the Share menu, simply invoke the share menu from any app, long press the app you’d like to pin and select the ‘Pin’ option. Using a similar method, you can also unpin apps from the Share menu.

Customise Quick Settings
Android OEMs have long offered the ability to customise the quick settings panel through their skins, though Google has been slacking in this department so far. The company has changed that with the release of Nougat as it has added the ability to rearrange and add new tiles in the Quick Settings panel.
If your Android device runs on a near-stock build of Android, you can quickly rearrange the tiles by bringing up the Quick Settings panel and tapping the ‘Edit’ button located on the top-right corner. Then rearrange the tiles by moving them around as you want to, and if you want to add new tiles, simply drag ‘n’ drop them from the ‘Drag to add tiles’ section.
![]()
Prioritise & Block Notifications
Google completely revamped the notification shade in Nougat and made it even better than before. Among the new features introduced to the notification shade is the ability to prioritise and block notifications. Considering the notification overload that exists nowadays, the ability to block and prioritise notifications from apps is a welcome one.
The block notifications feature, as its name suggests, lets you completely block notifications from an app. This can come in handy if you prefer a clean notification shade and want to hide any persistent notification from an app. Additionally, you can only silent notifications from an app so that it does not make any sound, vibrates your device or shows a notification card while you are using other apps.
Similarly, there is an option to prioritise notifications in Android Nougat so that you never miss notifications from an important app. Setting an app’s notification to priority will allow it to override Do Not Disturb mode which by default mutes all notifications. This ensures that you will get important notifications from a particular app even when your phone is set to Do Not Disturb mode.
You can block, mute, and prioritise notifications in Android Nougat from Settings -> Notifications.
![]()
Night Light
Taking a cue out of iOS 10, Google introduced a blue light filter in Nougat called Night Light. When enabled, the feature essentially filters blue light being emitted from the display and tints it to amber to reduce strain on your eyes, improve your quality of sleep, and make reading easier in dim light.
Night Light can be set to automatically enable and disable itself when the sun sets and rises or it can also be set to toggle itself on/off during a custom schedule. Lastly, there is always the option of manually enabling the feature as well.
On most newer phones running Nougat, Night Light is renamed to Blue light filter or Night mode.

System UI Tuner
Android has long been coming with a hidden Developer Options menu in the Settings app. Google debuted another hidden SystemUI tuner with Marshmallow and it’s still present in Nougat with more customisation options. As the name suggests, the hidden SystemUI Tuner menu contains customisation options related to the SystemUI. Most of these options are still under development which is why they are still under the hidden menu and will either graduate to a full blown feature by the next release of the OS or be removed completely.
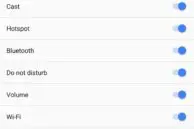
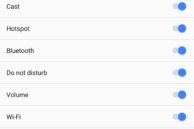
In Nougat, the hidden System UI tuner packs options related to customising the Status bar, Do Not Disturb, and control the priority of notifications. To enable the hidden System UI tuner, expand the Quick Settings panel and long press the cog icon/Settings button for a few seconds. When you remove your finger, a toast message will pop up confirming that the hidden System UI tuner has been activated.
What are your favorite Android Nougat tips and tricks? Do drop a comment and let us know.
