What is Adoptable Storage?
The default mode for removable storage on Android has always been to keep it separate from your phone’s built-in storage. Even when there is an option to move data to it, you often have to do it manually. For example, back in the early days. When supported moving apps to the SD card, you had to move each one manually. Today, standard removable storage does not support private app data media unless you use adoptable storage.
Adoptable storage formats your microSD card as a part of the system. Using the Ext 4GB file system 128-bit AES encryption. This new partition becomes part of the system’s primary storage location for app data. Before, you might only have had 10-12GB of storage available on a 16GB phone. You could have around 70GB if you adopt a 64GB microSD card. Data will be automatically distributed to the card and internal storage; no mucking around in file managers. In other words, adopting an SD card. Makes your phone’s storage space much more significant than just adding a separate pool of storage space.
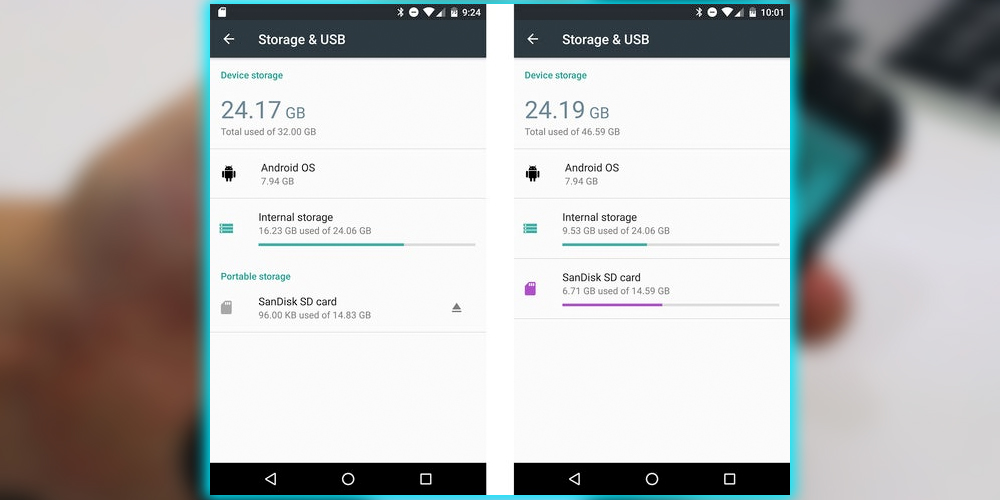

You can set up adopted storage with any card. But Android will run a quick benchmark to ensure it’s fast enough. Using a slower-than-recommended card can negatively impact your system performance, though it’s often not a huge difference. Read/write speeds should only lose about 5% if you use a fast card. When the card is adopted by the system, it’s a permanent part of your device. Since Android keeps most of its app data on the card. Removing it will cause things to crash left and right. If you force the system to forget the adopted storage. Because it’s been lost or damaged, all that data is gone forever.
How to Use Adoptable Storage on Your Phone
To use adopted storage, you need a phone running Android 6.0 Marshmallow and a microSD card slot. Some devices that will work right now include the Moto X, G4, and HTC One A9. Only some phones running Android 6.0 support the feature. The upcoming G5 or Galaxy S7 are said not to, for example.
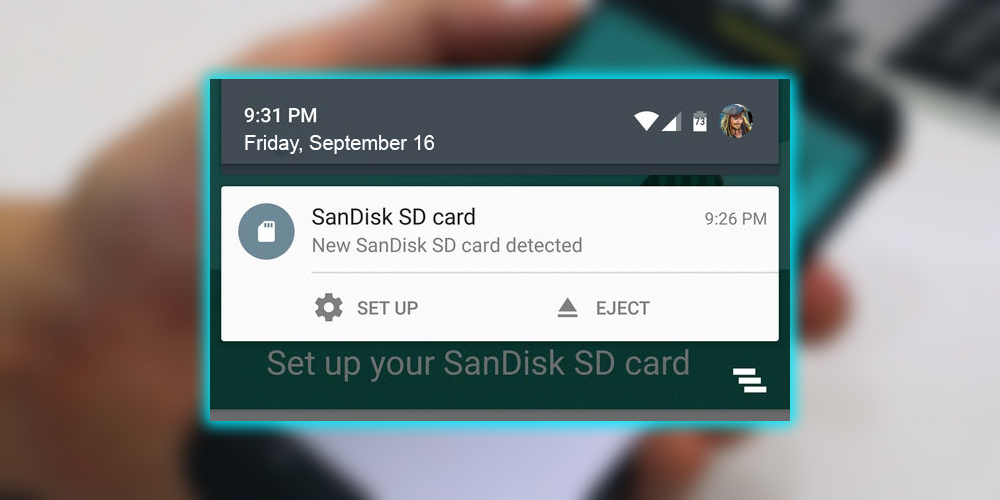
You’ll be prompted to choose a mode for your card as soon as you insert it. Most devices offer Portable or Internal as your choices. Select portable if you want to dump some files on the card. And be able to move it to another device. The internal option is adoptable storage, which means you can’t remove it from that device without some serious leg work.
Anything on the card will be lost when you adopt it as internal storage, which only takes a moment. Your device will immediately offer you the option of moving the app data media to the card. This will take a bit longer, depending on how much data is on your device. If you bypass this and want to go back later. Visit the internal storage menu and use the Migrate data option. You’ll probably end up with a few gigabytes of data on the card after the move.
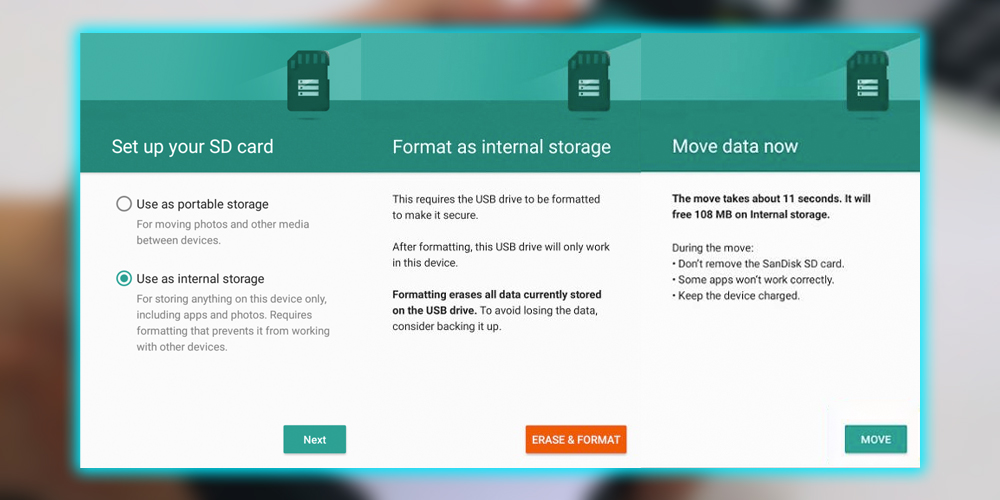
Configuration
Configuring adoptable storage in a few quick steps. If you decide to use the card for something else or want to trade up to a larger one. You need to do some housekeeping. The data stored on your card must be migrated to the internal flash storage to avoid breaking your apps. You can do that from the internal storage menu. If you can’t fit everything, you’ll have to delete things until you’re under the limit. At that point, you can go back into the SD card storage menu and format it as portable. Meaning it will work on other devices. If there’s any data still on it, you will lose it. So, there are some caveats with adoptable storage, but it’s much better than the old approach for most situations. This will be a handy feature if OEMs continue to offer devices with a paltry 16GB of storage.

