Yeah, we know what you’re thinking: You don’t want another remote control in your life, as the coffee table in the living room is already littered silly with them.
But what about a remote control for your ? st load the Gmote Android app on your mobile device then install the Gmote Server component on the you want to control (this works best when your Android are connected on the same network).
There are numerous reasons for setting up Gmote, but the most popular uses include remote controlling a home theater connected to a TV; controlling music playback on a ; for easily advancing through a werint presentation on a projector screen. Sound useful? t’s get started.
Installing the Gmote Android app
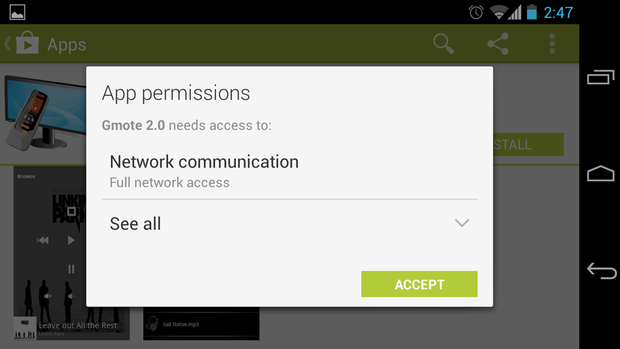
Simply search for “Gmote” in the ay store install the app. During installation, you’ll notice that the only permission that Gmote requests is Network communication. So many apps ask for every permission under the sun—why does a flashlight app need access to your contacts?—so it’s nice to see an app that only requests the sole permission that it actually needs in order to do its job.


As you can see, the Gmote Android app asks for very little.
Installing Gmote Server
On the you want to control, go to http://www.gmote.org/server download the appropriate Gmote Server program for your OS. If you plan on using Gmote frequently, you should check the box to “Automatically Run en Computer Starts.” Gmote Server is very light on resources, typically using a mere 700K of memory on a ndows 7 laptop.
You will likely need to allow access for javaw.exe in your ndows Firewall configuration. You should get a prompt for this after installing launching Gmote Server.
Configuring Gmote Server


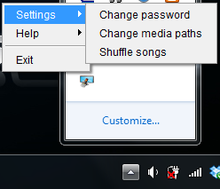
The Gmote Server settings menu.
After starting up the server, you should see the Gmote server icon in the notification area of your ndows taskbar—it looks like a widescreen TV with a remote in front of it. If you right-click this icon you can access the Gmote Server Settings Help menus.
The “Change password” feature in the Settings menu allows you to set an optional password for Gmote Server. If someone else on your network uses Gmote attempts to connect to your Gmote server, he won’t be able to, unless he knows the password.
The “Change media paths” feature is used to specify where Gmote should look for your media files, allowing for easy media selection playback from Android when using the “Browse” feature. The Gmote team recommends that you set up paths to the directories that store your media. If you have trouble accessing a particular media path, or it’s not showing up in Gmote on Android, you may need to move your media to a simpler, shorter file path, such as C:vid.
Using Gmote


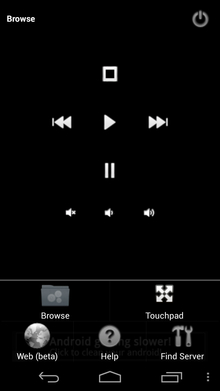
The menu options in the Gmote Android app.
After clicking the button labeled “I have installed the Server. Start Gmote!” on the initial Android app splash screen, you’ll see a screen with media control button options for stop, skip back, play, skip forward, pause, mute, volume down volume up. You’ll also notice options for “Browse” at the top left a “power” button on the top right. This is used to shut down exit the Gmote Server player on the .
After you try clicking one of the Android app features, Gmote should prompt you to connect to a server.
Gmote Touchpad
Gmote Touchpad is the feature I use most. This turns your Android device into a touchpad or mouse that can be used to control your . I use this all the time when I have my laptop hooked up to to the living room HDTV—perfect for finding playing video files stored on the , all from the comfort of my couch.
At the top left of the Touchpad screen, you’ll see a keyboard a mouse icon. The keyboard button pulls up your Android software keyboard, allowing you to enter text, which is then transmitted to the remote . This is very useful for entering a URin a browser’s address bar, among other conveniences.


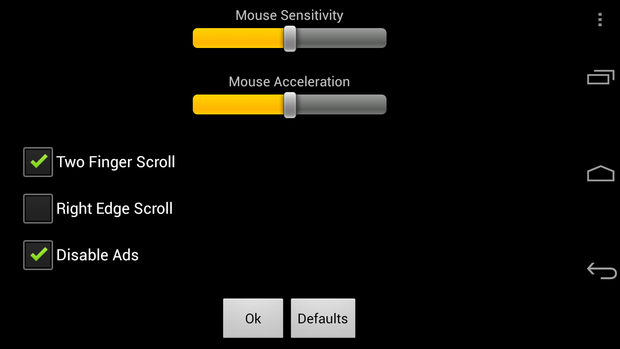
Here’s where you fine-tune how your Android device performs as a touchscreen mouse.
The mouse icon functions as a left-click hold feature, allowing you to drag items or select areas on the screen. On the right, you’ll notice a vertical line. Moving your finger up down to the right of that line provides a scroll function. ternatively, you can also use two fingers on the main Touchpad area for scrolling.
By default, Gmote has advertisements turned on, but thankfully you can turn them off for free in the Touchpad menu options. This is also where you turn on the Right ge Scroll feature, if desired.
Using Gmote with an HDTV
In ndows 7, you can go to Control nel>Display make text other items appear larger on your HDTV by choosing the Medium display option. If you still can’t read the tiny file names displayed on your HDTV, try using the Magnifier utility (ogram Files> Accessories>Ease of Access>Magnifier).
Gmote Browse feature
If you want more than just the remote Touchpad, you can also use Gmote’s Browse feature. You’ll get a list of files from within your defined media path locations, from there you can select a file to play, straight from Android.
en you click on a video or music file to play in Browse mode, Gmote Server will launch that file on your using the excellent V media player, which comes bundled with Gmote Server. You’ll then be able to use the media control buttons found on the default Gmote screen to control playback of the file.
One drawback to using the bundled V player is that you won’t see any media control options on screen—you’re forced to use the Android app for all playback controls.


Gmote launches videos on your in fullscreen mode using the V player.
Gmote b (beta)
The Gmote b (beta) feature opens a browser window in Android that contains a listing of popular online video sites, including YouTube, Hulu TED.
Hooking a laptop up to an HDTV for viewing Hulu videos is particularly useful. There are many videos on Hulu that are fully playable from a computer, yet are locked down otherwise due to silly licensing restrictions, preventing playback from HDTV’s, phones, game consoles tablets. (www.ebsta.com)
Once you navigate to the video page that you want to play on your , just click the “open on computer” button, it will launch right on your , for convenient access. You can then use the Gmote Touchpad feature to start the video, make it full screen control playback.
For more tips, tricks Q&A’s, check out the Gmote FAQ the Gmote Group.


