Samsung in all its wiseness decided to not support the adoptable storage feature of Marshmallow on the Galaxy S7 and S7 edge. The feature essentially allows you to install a microSD card on your new Galaxy handset, which will then be ‘fused’ with the internal storage of the handset.
This means that Android itself will take care of moving all your apps, games and other data to external storage to ensure that you have don’t have to manage it manually.
However, since Samsung has gone with the ‘old’ Lollipop style method, you will have to manually move apps, games and other files to external storage. Apart from being cumbersome, another problem here is that not all apps can be moved to external storage using this method, so you will not be able to free up as much space on the internal storage as you want.
On the flip side, fusing the external storage to act as an internal storage means that you cannot easily transfer music and other files to the external storage of the handset when you connect the phone to your PC. It also means that you will not be able to swap memory cards on your S7 or S7 edge at your will.
If these trade-offs don’t really bother you, read below to find out how you can get Marshmallow-style adoptable storage on the Galaxy S7 and S7 edge.
Note: It is highly recommended that you use at least a Class 10 or higher microSD card. Using a slower card can greatly affect the overall system performance.
Make sure that ADB/Fastboot are already set up on your Windows or Mac. If not, follow the guide here.
Step 1: On your Galaxy S7 or S7 edge, head over to Settings -> About Phone -> Software Info and tap on ‘Build Number’ 7 times.
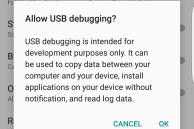
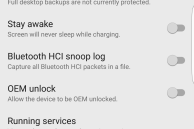
Step 2: Head back to Settings -> Developer Options and enable ‘USB Debugging’.
Step 3: Now, connect your Galaxy S7 or S7 edge to your PC, and open a new terminal or command prompt window. Verify that the handset is being detected by your PC by typing in the following command:
adb devices
Step 4: If your device is being detected, run the below commands one by one. If not, make sure that the appropriate drivers are installed on your PC.
adb shell
sm list-disks
Running the above command will output the disk ID of your memory card. Note it down since you will require it in the following steps.

Step 5: It is now time to format and partition the disk as an internal storage one. For this, run the following command in the ADB shell window you have opened:
sm partition disk:’000:00′ private
Make sure to replace the ‘000:00’ with the disk ID of your memory card.
You can also use only half the storage as adoptable and use the rest as external, which makes the most sense in my opinion. However, make sure that you have at least a 64GB microSD card or higher for this.
Run the below command for a 50:50 partition:
partition disk:179:160 mixed 50
Once you execute the above command, wait for a few minutes. Then, head over to Settings -> Storage and you will see that your Galaxy S7 or S7 edge now treats your memory card as an internal storage of the handset.

To immediately transfer most of your data to the ‘fused’ internal storage on your Galaxy S7 or S& edge, select the ‘Migrate data’ option. Do note that removing the SD card after this step can lead to certain apps and games not working.

If you want to revert back to the old Lollipop-style of SD card handling, tap on ‘SD Card’ followed by the 3-dot overflow menu button located at the top-right corner of the display and select the ‘Format as portable storage’ option.
If you are facing any issues while following the above steps, drop in a comment below and we will help you out.
Which style of external storage handling do you prefer? Lollipop or Marshmallow’s adoptable storage?
[Via MoDaCo]


